Friday, January 11, 2019

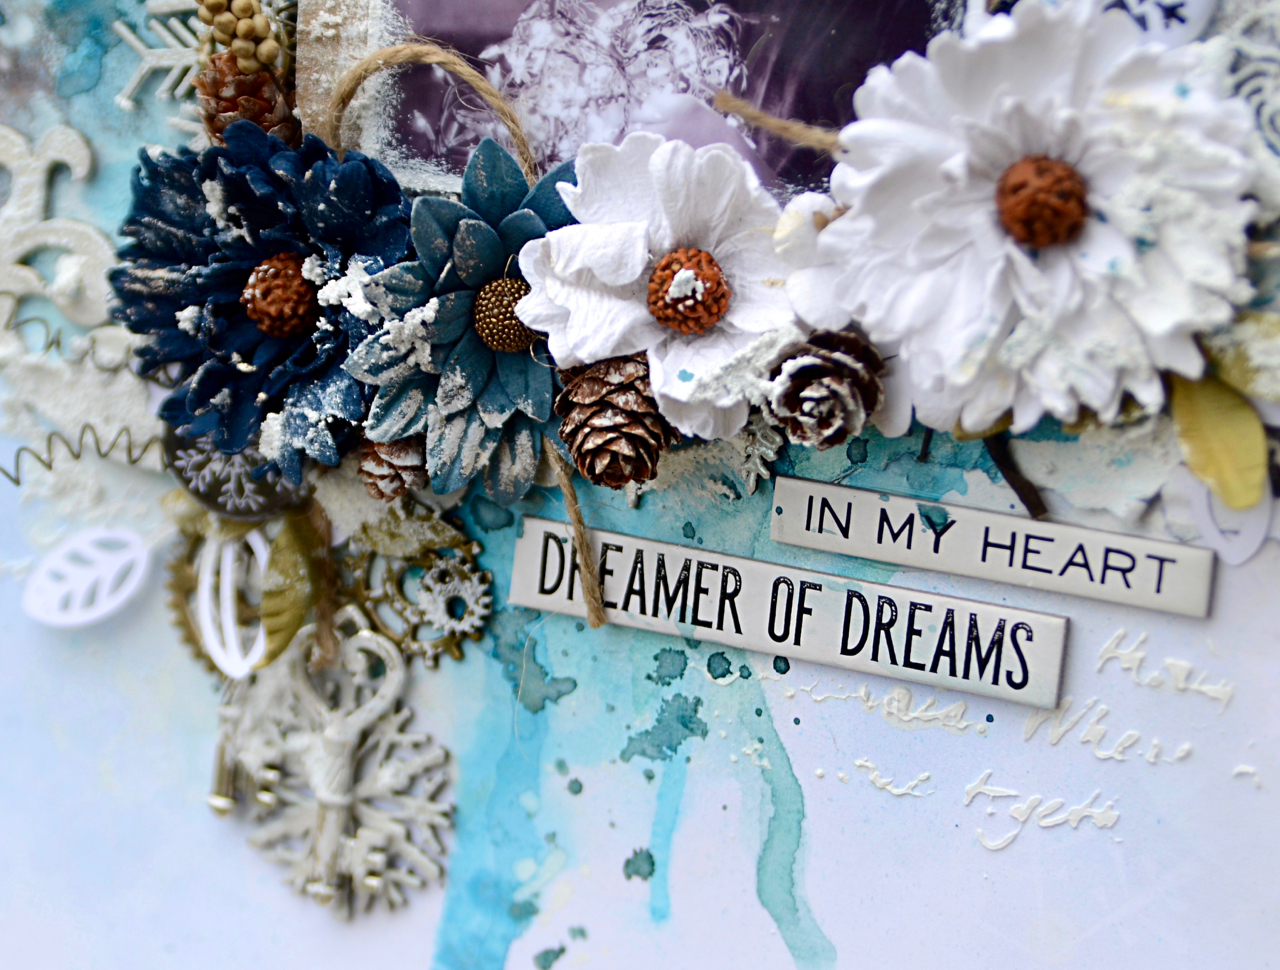
Dreamer Of Dreams

I'm not sure where to start. I was greatly inspired by Lisa Griffith's  page on her November post. I was also greatly inspired by the DT member Mary Tzalla's page for this challenge.

I did make this page for two challenges, both of whom compliment each other.


I adore blues and browns together, mixed with shiny metallic objects. For Creative Embellishments it was the snowflakes and pinecones all the way! I have listed all supplies used at the end of the post.


I am still attempting to "perfect" my mixed media style. I like combining different textures without a lot of interference from me. Meaning I like the metals mixed with delicate flowers combination.


The chipboard pieces are all layered with embossing powder and opal wax.


I wish I had a better photo of the key mold. The design really latched on to the opal wax after applying blue sprays to the piece.

Thank you for stopping by today!!!


Supplies:

--BoBunny's Sleigh Ride Collection

--Lindy's Stamp Gang:
---Flat Fabio Sidewalk Chalk
---Flat Fabio C'est la vie Cerise
---Flat Fabio Danny's Zuke's Denim
---Starburst Spray Azure Sea Asters
---EP Silver Moon Mistletoe

Prima Marketing Opal Magic Wax
Prima Marketing Key Mold

DecoArt Snow-Tex

13@arts Pinecones

49 and Market flowers

Creative Embellishments Snowflakes, swirls and flairs

Writing template and modeling paste

Cut up blue jeans

Lollibeads Keys and Gears


Monday, January 7, 2019

Christmas Tree

Hello!! Today I would like to share with you my latest page using HipKitClub December's main kit.

I have been stalking them for years and I have finally decided to take the plunge to see where the kits lead me. I have two styles I like to play with, one is with bright colors and large die cuts and the other is mixed media.

I am hoping that HipKits encourage my lighter side to come out more. Although I have plenty of paper in my stash, most of it is not recent or just scraps left from other projects.

Without further ado, here is my lighter side using an exclusive cut file by HipKit. I did use SN@P Basics wooden paper for my background.

THANK YOU FOR STOPPING BY TODAY!!


Tuesday, January 1, 2019

Scrap The Boys: Summer

Hello and welcome to 2019!!!!! I'm happy to say that I will be continuing my journey with Scrap The Boys for the next 6 months. Without further ado, here is the challenge.


Scrap The Boys is based out of Australia and right now it is experiencing summer. I was hugely inspired by "HeyElsie" work on her Instagram page.


The large sun in the background can be found at the Silhouette store. I made "summer" using SCAL4 and lots of cursing and yelling at my computer to "just do it". LOL . . . it's a learning curve.

I used a combination of Echo Park and Lori Whitlock paper (a few years old) for this layout.

THANKS FOR STOPPING BY TODAY!!!

Thursday, December 20, 2018

Believe . . . Mixed Media Canvas

Hello there!!! Today I would love to share with you my latest Christmas project(s). Actually, I made three of these canvases but the other two I will share later as they are Christmas presents for my mom and sister.

I follow Creative Embellishments blog and challenges every month. I think my next creation will involve more gears as this photo definitely has a lot of cogs and wheels going on in it.


Without further ado here is what I came up with. I also planned on submitting to the More Than Words mixed media challenge but I forgot to add stamping. Oh well.

However, Lindy's Stamp Gang also has a color challenge this month as well.  I do not have the exact matches of their color challenge, but I do have the Jingle Bells spray set and embossing set.


I was extremely inspired by Olga Ravenskaya's Winter Forest Canvas that she made back in January 2018. I don't have her talent, but I sure did have fun making this.

THANK YOU FOR STOPPING BY TODAY!


This canvas is a mixture of Creative Embellishment's chipboard pieces, dies by Sue Wilson at DiesRUs, Finnabair products, Lindy's Stamp Gang products and random collections from my stash.


The scroll is music pattern paper by Graphic 45 "12 Days of Christmas" collection. I used embossing powder Bougainvillea Red Teal on the poinsettias. The reindeer is a mixed of the red teal and Scotch Broom Yellow.


Here is a layer of the embossed dies and chipboard, all embossing by Lindy's products. Believe has Silver Moon Turquoise  and the leaves are all embossed using Fiddlehead Fern Green.

My favorite piece in all this is the frame. I had no idea that mixing Scotch Broom Yellow and Midnight Gold embossing powders would create such an effect.


Supplies:

Lindy's Stamp Gang:

Creative Embellishments (frame, reindeer and leaves)

Finnabair Art Stones and Melange Art Pebbles

Straws from Hobby Lobby

Graphic 45 "12 Days of Christmas" - scroll

Ribbon

Christmas Flair

(can be found at www.DiesRUs.com)


Wednesday, December 12, 2018

Journal: Life Is A Balance

Today I'm sharing a journal page made for the challenge blog, Mixed Media Art. I was greatly inspired by DT member Marie Johansson's journal page. This challenge reminds me so much of BoBunny's old Etc. line, I just had to pull out my scraps and play.


LIFE IS A BALANCE OF HOLDING ON AND LETTING GO

I had no rhyme or reason to the making of this journal page, except I knew I wanted to use my Tim Holtz's bird stamps and BoBunny paper. I do always look for quotes that inspire me and reflect on how I'm feeling now, but it's funny how I do that after I've made the background.

Thank you for stopping by today.


Supplies:

--BoBunny's Etc. Line (a few years old and still one of my favorites)
--Etc. Line - stickers for the title
--Not sure where the music paper is from

Stamps:
49 and Market
Tim Holtz (birds)
Blue Fern Studios

Lindy's Stamp Gang:
Moon Shadow Mist - Golden Doubloons
Starburst Spray - Azure Sea Asters

Faber Castell Gelatos:
Cotton Candy
Gold Champagne


Saturday, December 1, 2018

Scrap The Boys: Merry Christmas

Hey! It's December 1st and you know what that means!!! Time for a new challenge at 


I was greatly inspired by Missy Whidden's summer piece from a couple years ago.
I didn't quite pull off her bright design but it's all good anyway.


I added a light layer of white acrylic paint, instead of gesso. With a small chevron stencil, I then
colored in the pattern using metallic gelatos Ice Currant and Gold Champagne.
I followed that up with stitching! Pattern paper is by Teresa Collins: Tinsel & Company.


Thanks for stopping by today!!!


Thursday, November 15, 2018

Thanksgiving Gift Basket

Hello and welcome to my blog! It's time again for me to have made something for "Adopt-A-Staff" program at my son's school. At the beginning of the school year, I had to pick one staff member or teacher and volunteer to anonymously bring that person a gift every month.

Yeah . . . I'm choosing to show off a little bit and hopefully she really likes what I've done so far. My goal is to hand make her something every month. So far, I've been using the awesome projects designed by Dreaming Tree. 

Next month is not only Christmas, but it's her birthday month too. Hmmmmm........

Without further ado, I made this basket from the Harvest Time bundle at Dreaming Tree. I have made several of their projects and have found them not only easy to do (relatively speaking) but really hitting the spot on what I'm looking for when it comes to handmade 3D projects.

My harvest basket is made using the Simple Stories: Forever Fall collection.

Thanks for stopping by today!!


Monday, November 12, 2018

Canvas: FAMILY

Hello and welcome to my blog! Today I would love to share with you my latest mixed media canvas using my favorite Fall colors.

I made this project with two different challenges in mind; Creative Embellishments and Lindy's Stamp Gang.

Lindy's Stamp Gang
Creative Embellishments


I would love to enter both challenges every month but sometimes the colors aren't quite in my arsenal. For whatever reason, I still don't have a really good red from Lindy's or a deep blue. First world problems, right?!

I am especially proud of this project because I did not "lift" from anyone else. This is 100% out of my head. Now, countless hours spent watching others create certainly helped, and I do recommend that for anyone learning a new way of crafting. The supplies used are listed at the end of my post.

Thanks for stopping by today!!!


I touched up the entire project at the end with shimmery acrylic paint: ginger magic.


I am particularly fond of adding pebbles and stones to my canvases. 
It's such a simple and easy way to add texture.


I would have liked to use deeper colors on this project, but I chose to stick with what I had 
in my stash. Funny thing about budgets, right?


I did use several chipboard pieces by Creative Embellishments. They did get a little buried
underneath all the flowers and pinecones. That being said I have learned to build my
canvases with pieces that will get "buried" because it all adds to the final art.

THANKS FOR STOPPING BY TODAY!!

Supplies:

8x5 canvas

Creative Embellishments:
--Apples
--Apple basket 
--Flourish and stems

49 and Market flowers

Prima Marketing
--Flowers
--Gold Rust Paste - Finnabair
--Acrylic Paint: Ginger Magic - Finnabair
--Art Stones - Finnabair
--Melange Art Pebbles - Finnabair
--Burlap
--Shabby Chic Treasures: Leaves
--Thread Letters: Family

Finnabair:
3D Gloss Gel
Moldeling Paste
Soft Gloss Gel
Stencils

13@rts:
--Pinecones

Lindy's Stamp Gang:
Starburst Spray: Tibetan Poppy Teal
Starburst Spray: Cowabunga Copper
Starburst Spray: Red Hot Poker Orange

KaiserCraft: Mini Paper Blooms: Aubergine

White Gesso
Glue Gun

Thursday, November 1, 2018

Scrap The Boys: U + Me

 Hello there! It's that time again for a new challenge at Scrap The Boys!! 

Thanks for stopping by today!!


I have lots of photos of my son and I'm not in many of them. I have even fewer photos of me and my husband, but we did get family photos taken last year. So I thought this was a great opportunity to make a page about us! I was greatly inspired by Natalie DeSousa's page with Simple Stories. 


I used leaf cut files from the Silhouette Design Store. All the pattern paper and extras are by Fancy Pants "Golden Days" collection.


You can really bring a page together just by adding stitching.

Thanks for stopping by today!

Supplies:

Paper, stickers and die cuts by:
Fancy Pants - Golden Days

AC Cardstock - smooth white

Sewing Maching

Silhouette Cameo

Thursday, October 4, 2018

Trixie Treat Box

Hello there! Today I would like to share with you my second teacher project for this year. My son's school has a "secret santa" type program for all teachers and staff to receive a gift once a month. So for the entire school year, I am to anonymously give my selected staff member a gift. Last month I started with a bag with Suzy's Apple, also by Dreaming Tree.

With October being Halloween, I couldn't pass up the opportunity to make this Trixie Treat Bag, by Dreaming Tree.

These treat bags are super easy to make but I did add a few delicious details of my own to really "dress" her up.

I have more than enough pattern paper in my stash to work with my 3-D projects. I think it can potentially add interest to your work, like using pattern paper for the face. Kind of makes her look like she's got chicken pox scars, huh? I also added extra pearls for more freckles on her cheeks. But I wanted her to have a feminine, soft side so I added a bow, pearl earrings, and highlights to her hair using Stickles.

Hope you like her, and thanks for stopping by today.


And don't forget you can really change a character's eyes using pattern paper. So my soft, feminine witch with scars also has a bit of a "wicked" side.


I had the hardest time really getting a good photo of her without losing the effect of the highlights.
I miss my light box . . . sigh.

Supplies:

--Bella Blvd. - Spooktacular
--Bella Blvd. - Halloween Magic
AC Cardstock - Black and Purple

Brads and Pearls

Stickles - Turquoise

Glossy Accents (on teeth)

Handmade Bow

Monday, October 1, 2018

Scrap The Boys: Love You So Much

Hello! It's the first of the month which means it is time for a new challenge at Scrap The Boys!!!


I went with the white, pink, and blue for a layout about my son on a swing. He had the best toothless smile only a mother can love!!!! (Hint: I have another photo of him missing so many teeth it's hilarious.)

Making a page about my son in his younger days means I get to reach for bright colors! Woo hoo! And I'm rolling in bright colors and paper packs by Pretty Little Studio.

Hope you like my page and thanks for stopping by today!!!


Supplies:
--Pink Fresh - Dream On - (background border)
--Pretty Little Studio - Ain't Life Grand collection of paper, dies, cut-aparts, and stickers

Sewing Machine


Sillouette Cameo

Dymo Label

Friday, September 7, 2018

Mixed Media Project: Adventure Awaits

Hello there! Welcome to my blog! Today I would love to share with you my beautiful canvas that I made for the September's challenge at 'More than Words'.

Summer is all about play. It's about ice-cold lemonade and sweet tea on the back porch. It's about trips to the water park and being endlessly stuffed into a bathing suit. In Texas, it's about being hot with so much SUNSHINE!!!

But the end of Summer 2018, for me, is about heartbreak. It's about extreme conflict and betrayal between family members.

My husband and I are slowly picking up the pieces of ourselves and putting one foot in front of the other. We have been keeping busy with rebuilding and reorganizing our home, which is especially true for our son as he got a whole extra room to stretch out into. We did lots of painting and reorganizing, but none of those colors were yellow. He's an 11 year old boy, what can I say.

I have also been reorganizing myself back into the craft world. I have been barely hanging on, wanting to do so much more, but holding myself back due to so much anger and sadness.

I'm through with that nonsense. Although I still have a long way to go to find true healing, finding my creative self again has been a blessing.

Without further ado, here is my "beginning of a new adventure" piece filled with all the bright colors that "sunshine" and "summer" provides. I list all supplies used at the end of my posts.

Thank you for stopping by today.

The challenge:


First, I must give immense credit to Nadia's piece that she made for GDT at Faber-Castel. She made a video tutorial in which I followed her technique closely, adding several twists of my own along the way. I do this because I'm not quite confident enough yet to make a piece that doesn't turn out muddy. I don't know why I find gelatos intimidating, but I am so grateful there are people out there willing to make videos to help us "head-scratchers" along.


Supplies:

Fabel-Castel Gelatos: Tangerine, Cotton Candy, Lemon
Strathmore Watercolor paper
Stamps by 49andMarket

Finnabair products:
Art Stones
Melange Art Pebbles

Lindy's Stamp Gang:
Flat Spray C'est la vie Cerise
Flat Spray Luminous Lemon

Stencil and homemade paste
Tim Holtz's Quote Chips and metal butterfly
Prima Marketing Mold and Red Amber Wax
Flowers by Blue Fern Studios
Versa Magic Chalk Ink: Pumpkin Spice
Die Cuts Stitched Circles
Twine
Gloss Gel Medium

Wednesday, September 5, 2018

Back to School Gift: Suzy's Apple

Hello there! My son's school has a "adopt a teacher" campaign in which parents can give a gift to a teacher or staff member once a month. Of course, all of my son's teachers were taken so I chose the vice principal.

It's been quite a while since I made a 3D project. I don't think I've lost my touch. This was quite fun to make and rather easy as far as 3D projects go. This is actually an elaborate gift card holder that I hope the vice principal will display in her office.

This project is called Suzy's Apple (although I prefer Suzie since that was how my BFF in high school spelled her name). You can find this project and how to make it at Dreaming Tree.

Thank you for stopping by today!!!


I had fun choosing my own floral sprays to fill in this project with from Hobby Lobby.


I did add Liquid Pearls "white opal" to the cheeks of this worm.


I'm going to deviate from my usual blog posts and not list supplies. Honestly, Dreaming Tree has already done all the work in listing everything you need to know to get started. I did deviate slightly, but that is just normal creative process.