Friday, January 18, 2013

Treasure Box Designs: One Cool Kid

ONE COOL KID!

Here is my latest page featuring Treasure Box Designs: One Cool Kid.  I LOVE how cute this file turned out! I must admit however, that this page took over a week for me to complete.  I just couldn't seem to be completely happy with it.  I'm still not, but I needed to call it done. Thanks for stopping by!!

I followed this sketch on Pinterest.


Solid papers for the die cut are from paper studios at HL.
Supplies:
PP: Little Yellow Bicycle "Winterings"
Textured colors for the boy and snowman
Stickles: Silver Ice and Turquoise Blue
Snowflake punch, flag punch
Stitching
Pearls
LYB: Cardstock Stickers
RubOn Quote (don't know where)
Puffy Paint
Buttons 
Twine

Sunday, January 13, 2013

Treasure Box Design Team

Treasure Box Designs, an online die cutting design store, recently had a DT call.  With a little nudging, nail biting (on my part) and a WHOLE lot of encouragement, I decided to try out.  WELL, I was one of 8 ladies picked!!!  I am very excited about this opportunity to work along side such wonderfully talented ladies!

Without further ado . . . here is my first project!!!  I used TBD "Snow Birdie" file on this LO.  I also handmade my own flowers!  The title is from Cricut Winter Woodland Cartridge.  The "blues" part of my title did not show up well . . . should have used a different color of Stickles. *shrugs*

Of course I did some hand stitching as well using a circle template.

This picture is me taken in December 2011.  I've been waiting for over a year for the right PP to come along as well as the right die cut, sketch, etc etc. All the PP is Bo Bunny's "Powder Mountain" line.

There are some brads and small branches on the LO as well.  Sorry, don't have a close up picture of it.

I added puffy paint and stickles to the bird as well as various places on my LO. It's adds such a wonderful touch to anything handmade.

Supplies:

PP: Bo Bunny Powder Mountain
TBD File: Snow Birdie
Cricut Winter Woodland
Bling
Branch Punch
Spellbinders Parisian Accents
Chalk Ink
Stickles Silver Ice
Circle Template
Twine

Friday, January 11, 2013

SOUS: Switch-a-roo Die Cut Challenge


Hello there! It's Friday again and time for a SOUS die cut challenge!!  This week is "switch-a-roo"!!  That means to switch a letter in your title for a die cut. Simple really . . . 

For this challenge I chose to scrap a LO with a picture of my dad.  There are actually several simple die cuts on this LO but the one that counts is in my title. I followed a sketch by myscrapsandmoresketches that I had pinned on Pinterest.

Thanks for stopping by today!  Go on the the SOUS blog and get more awesome inspiring ideas for die cuts on your layouts!!


I love layering on my LO's.  Just makes you want to go "poking" to see what all you can find huh?

I used the chicken wire template here for some background stenciling.
Here is a close up of my title. I used SCAL to create it.
Supplies:

EP: This & That paper line (various PP)
Stitching with sewing machine
Chicken Wire template
TH Distress ink: Frayed Burlap
Embellishment from my stash
Burlap from my stash
Various Stickers from the same EP line
Buttons
Alpha Stickers
2" Triangle/Flag Punch
SCAL


Sunday, January 6, 2013

Happy Birthday!

HAPPY BIRTHDAY, LITTLE SISTER!!


Supplies:

Rose Spellbinder Dies
Labels Three Spellbinder Dies
Pearls
Twine
MME PP 6x6 Reunion
Stitching
Border Punch
Platinum Liquid Pearls

Friday, December 28, 2012

SOUS Project: DEER


SOUS Friday Diecut Challenge: Use a deer on your project.

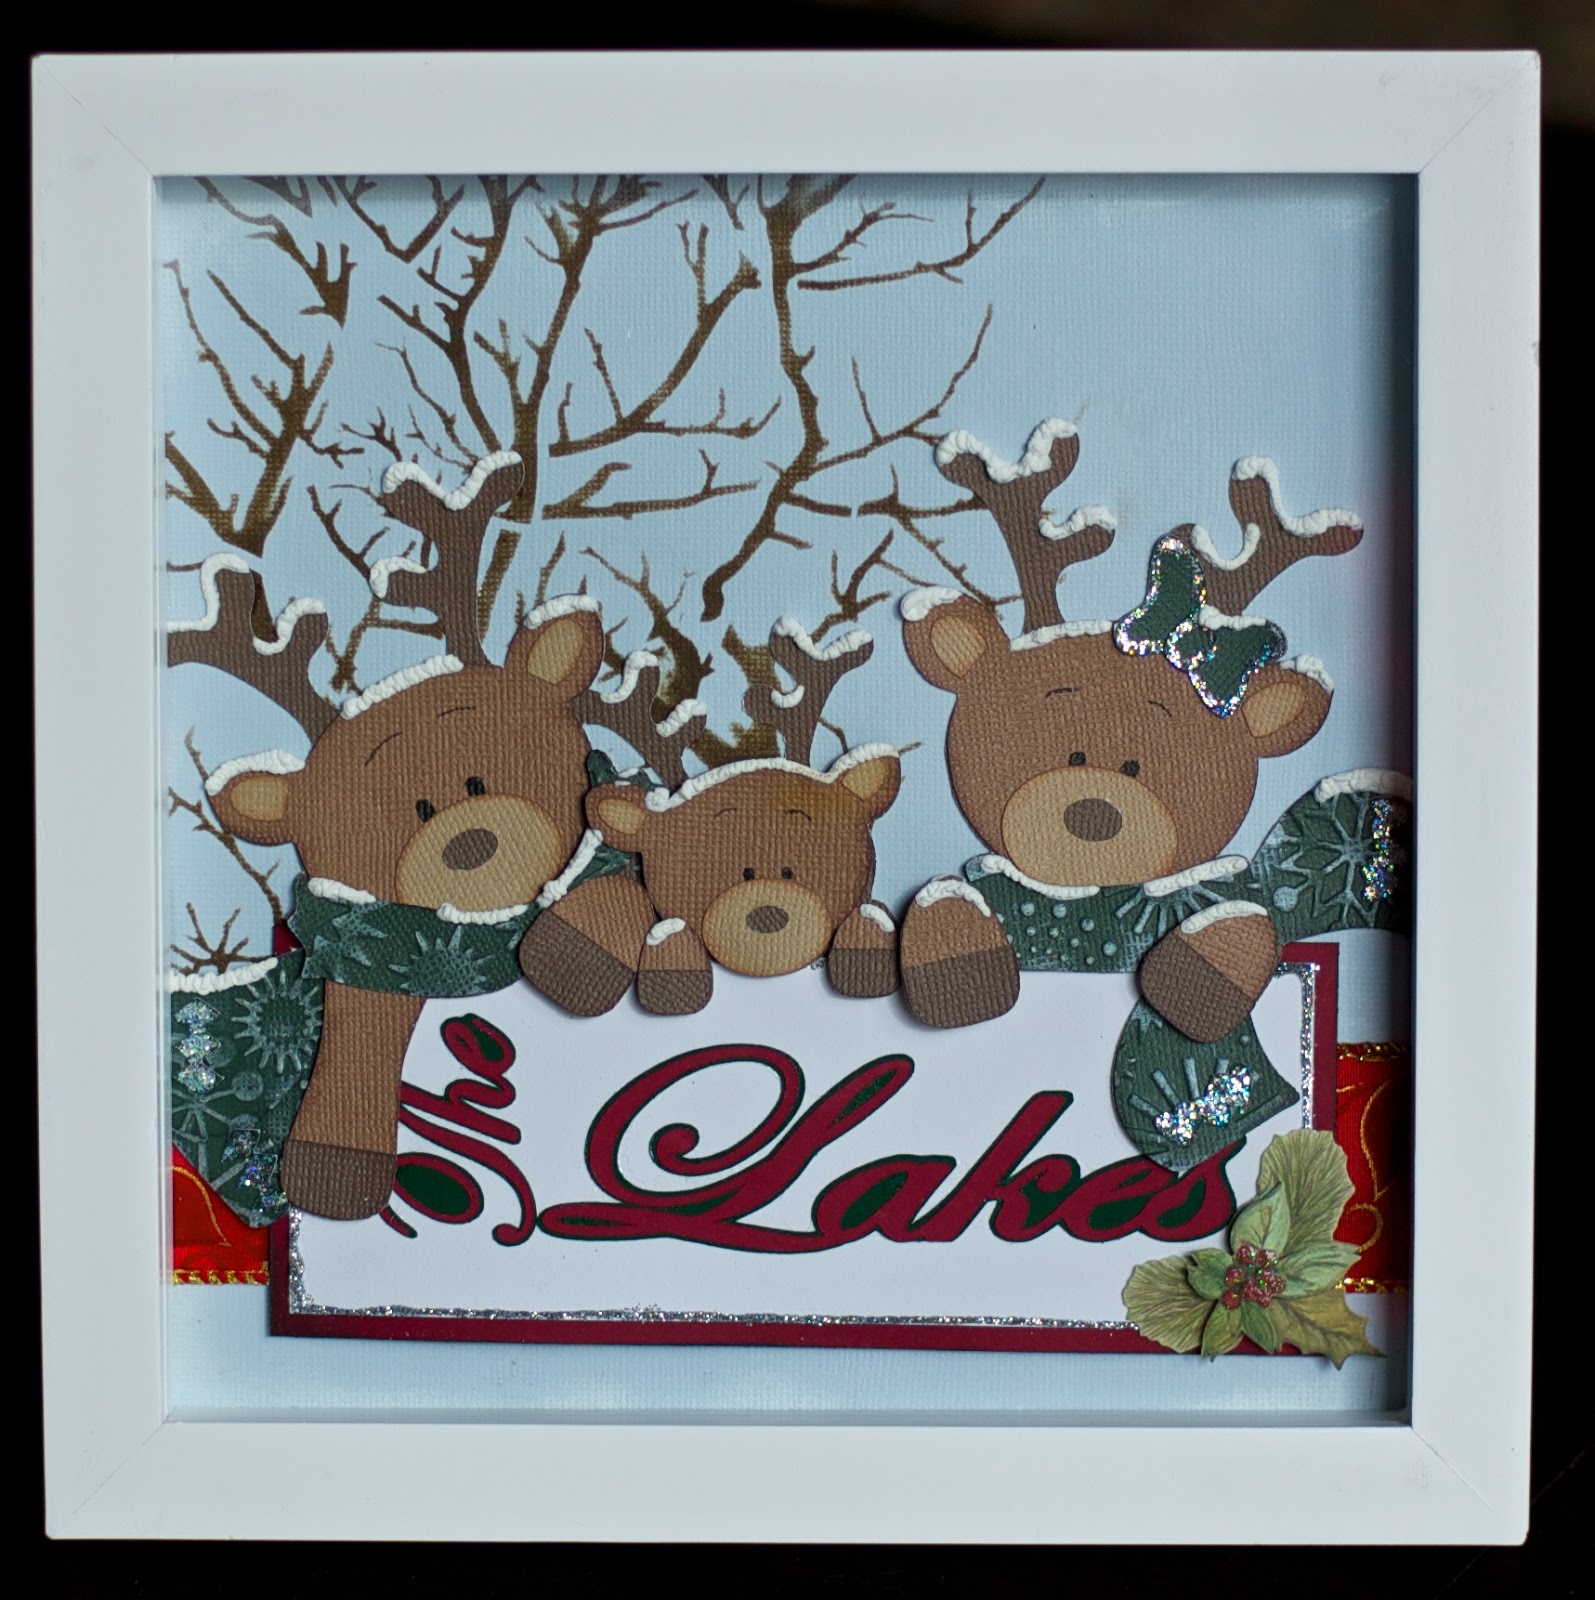
Here I am with this week's design team project for SOUS featuring a die cut of a deer!  Well, in my case, a family of deer.

I probably create an equal mixture of layouts and cards, but rarely do I make an altered project.  I didn't actually "alter" anything, but you get the idea. I was actually inspired with several different ideas to come up with this framed art. 

First, I saw this cute 8x8 frame in HL and the wheels started turning. Second, I recently helped a friend who wanted the use of my Cricut to make Christmas presents for her family.  She showed up with an arm load of Christmas colored paper and a very specific idea for her lettering.  The font I used on this is the same font she used on her altered projects. Lastly, I needed to use deer. So I rummaged thru my choice of files and "remembered" my deer family from myscrapchick.com!!!

This project is "mine"! Meaning I didn't lift this from anywhere I know.  I'm sure someone has made something resembling this before, but I still plucked this out of my own head.  Thank you for stopping by! I hope this week's die cut challenge at SOUS will inspire you to make something with a deer too!


Here is a closer view of the embellished deer.

Supplies:
6x6 template "mini branches"
TH Distress Ink Walnut Stain
Paper Studio textured and smooth paper
SCAL program
Deer Family from scrapchick
Snowflake embossing folder
Stickles Silver Glitter Glue
ICE Stickles Silver Ice Glitter Glue
Pop Dots
Tulip Puffy Paint - White
Wired Edge Ribbon from Michaels (on sale!)
Holly embellishment
Pen - Micron 005 Black

Friday, December 14, 2012

Santa's Workshop: Diecut Challenge


SOUS Die Cut Challenge: Toys Toys Toys!!!
Santa's Workshop

Welcome back to Friday's SOUS die cut challenge: toys toys toys!!  I was lucky - I had the perfect picture to scrap of my son posing with Santa in his toy workshop!!  But, I did have to do some "research" to get the right die cut toys for this LO.  I ended up at www.svgcuts.com and fell in love with one of their files featuring nothing but "old time" toys.  The file has a good mixture of dies for both boys and girls.

And of course I'm overrun with AC Christmas paper and yes, used a lot of scraps!!  Also I scraplifted this LO from one of my pins on Pinterest. 

Thank you for stopping by and hope you feel inspired to make your own LO with toys!!! 


Dog, tricycle and car are all from svgcuts.com  The glittery chipboard items are from my stash.

The die and Santa nesting doll are also from svgcuts.com The flower is handmade by me.  I also used Spellbinders to accent the photo.

The title is from CC: Winter Frolic.  I used the xmas red Stickles on the word "workshop".

Supplies:

PP: AC Christmas Paper front and back
White ink gel pen
Stickles: Xmas Red
CC: Winter Frolic
www.svgcuts.com
Glitter chipboard diecuts from stash
Bow is from stash
Gemstones by . . . somebody.
Spellbinders Classic Scalloped Circles (small)

Tuesday, December 4, 2012

Thank You

Hello there!

I made this card for a special client at my work who provided a holiday dinner for all of us today.  What a treat!!!  She loves and cares for many animals and has been a huge supporter of our animal hospital.

So naturally, I asked to make her a special "thank you" card instead of getting her a store-bought card!!

Our client loves cats plus she provided a holiday meal so  . . . . I came up with this adorable cat from Treasure Box Designs plus I included a Santa hat from another file.  I followed a sketch by Mojo Monday.


Supplies:

MME: Sweater Weather 6x6 paper pad
Die Cut - Treasure Box Designs
Stamp: www.craftspotbykimberly.blogspot.com
Poinsetta 3D embellishments
Spellbinders: Label seventeen

Friday, November 30, 2012

SOUS project

Is it Friday again?!!  Well, here I am with my DT project for SOUS to use to a die cut "gifts".  So, without further ado . . . here's my interpretation.

I not only used die cut gifts on my LO, but I also used ornaments as well.  Both on from CC Winter Frolic.  I scraplifted this LO from my scrapbook pages' board on Pinterest.

Thanks for stopping by and hope you are inspired too by the many wonderful projects of the die cut team over at SOUS!!

Really had a hard time getting a good solid picture of this LO.  This is actually my second attempt.


Supplies:
Cricut Cartridge Winter Frolic
PP: Imaginisce and American Crafts
Embellishments: Various holiday items from my stash
Punches (2 I think)
"Zipper" Scissors

Wednesday, November 21, 2012

Chance


Happy Birthday Nephew!!

I made this card in record time for my nephew's birthday.  I was inspired from a card on Pinterest.  I hope he has a great day!!


Supplies:

PP: October Afternoon
Twine
Kraft paper
TH embossing plate
October Afternoon embellishments
Staples
Various alphabet letters from stash

Friday, November 16, 2012

SOUS Project: Die Cut Owls


Hello friends!! Here we are with another project for SOUS.  This Friday our project was to include a die cut owl.

Lately my brain has been on overload and I simply could not come up with a layout that included owls.  So I tried a different approach and made Christmas tags with these cute snow owls from TreasureBoxDesigns.

Sweet and simple this week I know . . . but hopefully inspiring all the same. Thanks for stopping by!!

P.S. I REALLY need to get a set up made for taking pictures of my crafty projects.


Supplies:

PP - BG Eskimo Kisses (starry night)
AC ribbon
Textured cardstock for the owls
Candy Rock Stickles

Wednesday, November 7, 2012

Border Collie


A repeat patron of mine asked for a "Heal" card with a border collie.  So, I went digging . . . deep.  I did end up using a Treasure Box Designs file I already had.  Instead of making the dog a various shade of brown, I made him black and white and voila!!

I had two days to make this card.  Now, that's not unusual in itself except the request came on a Tuesday.  *chuckles* I almost never scrap or do anything crafty during the week.

The feedback from my patron was the card was well received by everyone who signed it and by the recipient (none of whom I know).

Thanks for stopping by!!


Supplies:

PP:  LilyBeeDesign Buttercup 6x6 pad
Treasure Box Designs cutting file
Navy Blue stitching thread
SpellBinder's Labels Seventeen
Buttons from stash
Fiskar's Punch
Tiny Alpha Letters

Monday, November 5, 2012

Tag Swap

For November, I signed up for a tag swap at Treasure Box Designs.  I am super excited about seeing what other crafters come up with and how they use their talents with paper piecing.  The rules are three tags 3x4 each and of course use TBD files.

Here are mine!! I am so pleased with how these turned out!!  I am also just a little bit sad to have to let them go . . . but that's just inspiration to make more right?


Supplies:

Dimension = 3x4
PP:  BoBunny Scraps
Various Solid colors for the birds
Snowflake stamp, versamark ink and Perfect Pearls for the patterns on clothes
Twine
McGill Leaf Punch

Thanks for stopping by!!

Friday, November 2, 2012

SOUS DieCut Challenge


Hey there Peeps!! The SOUS diecut challenge for this week is to use the words Fall or Autumn on your project.  

So for myself, I had two things I really wanted to use.  This adorable bear and title from Treasure Box Designs AND a photo of my son and husband at our first traditional outing to local Huber's Farm.

I used a sketch from a pin on Pinterest.

I'm having a LOT of fun trying to learn how to make "eyes".  I could have gone all out - you know - with eyelashes and more extreme shading but I wanted to stick with a more boyish looking bear.

Thanks for stopping by!!!  What are you gonna make?


A closer look at the shading and placement of the die cut bear.

Supplies:
PP: Scraps!
Honeycomb template
Distress Ink: Walnut Stain
Treasure Box Designs Die Cuts
Buttons and Brads by Bobunny
Wood Die Cuts stained with Distress Stains
This list does not include the supplies I used for the bear, leaves, flowers and crow.